Sunday, May 19, 2019

Literature, Light, and Laser Cutting with Fifth Grade

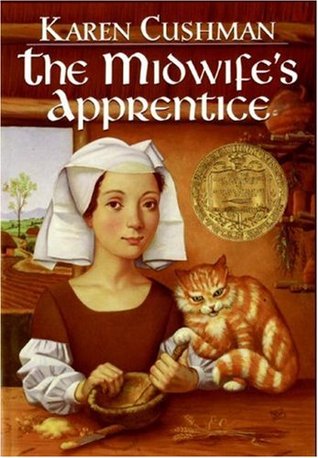
Fifth graders read the book “The Midwife’s Apprentice” by Karen Cushman as part of their Medieval England study. The book is the story of a young homeless girl who overcomes failure to find hope and her place in the world. Students spent time talking about scenes in the book where the main character Alyce faces challenges and the moments where she overcomes difficulties in life. This became the inspiration for a maker project in the library, a shadow box picture.  A shadow box picture uses simple paper or cardboard cut scenes stacked together and backed with tissue paper to allow the light to shine through and highlight the figures.


The fifth grade teacher and I were inspired by pictures he had found of scenery from plays that used simple backgrounds and colors to express the different moments, emotions and moods that were happening in the play. Could students do the same thing with scenes from the book? Fifth graders would make connections with what was happening in the book during important scenes and make deeper connections with feelings and emotions the characters were going through. Then using simple drawings and different tissue paper colors they would express their understanding of the characters with the shadow frames.


Fifth graders picked an important scene from the book that highlighted overcoming a challenge or a difficult time for Alyce. After they identified a scene, they drew simple pictures. The pictures were outlines of characters or objects from the scene in the book, and connected by one continuous line. Fifth graders needed to be very thoughtful about what they were drawing and how they were illustration the events of the scene. The laser cutter scans the lines that are drawn and then cuts the lines out of different materials, in this case cardboard. Fifth graders needed to draw their scenes in one continuous line for this to work. They really had to think and plan out their illustrations and layers to ensure they were expressing the events of the book.


Students designed two - three layers of action for their picture for the shadow box they created. Then, fifth graders used the new laser cutter in the library to cut out their drawings. Using lots of cardboard from our cardboard closet, students also measured and cut out the frames and layers for their frames. The final step was picking the tissue paper colors that reflected the mood of the scene from the book. Some students used lighter colors to signify that Alyce overcoming a challenge, others chose darker colors to express that Alyce was dealing with a failure or sad time in her life. Fifth graders built their frames, layering their laser cut scenes with cardboard frames and tissue paper.


The final projects are beautiful, light catching shadow boxes that highlight the connections fifth graders made from reading the book. By using simple cardboard and tissue paper materials and the skills they learned using the laser cutter, they produced beautiful shadow boxes. All the shadow frames were displayed in the library hallway windows.

Monday, April 22, 2019

History, Community and Minecraft with 3rd grade

3rd grade: A year-long study
“What does it mean to be a community?”

My third grade students study the history of the City of Chicago throughout the school year as their central topic. In the library the last couple years, I have designed year long programs and projects that connect to the learning students are doing in the classroom. Last year the class made deeper connections with the city and different communities that lived in the area of history and how transportation was an essential part of the fabric of the city. This year, in collaboration with the third grade teachers and the Ed tech teacher, we decided to focus on the driving question “What does it mean to be a community?”

In the fall, students learned more about the Ojibwe Peoples and focused on learning more about the different jobs and roles members of the tribe had and how they worked together to benefit the whole community. Students collected research and then sorted different responsibilities to create a master list of jobs. Then working in small groups, students designed logos for one of the jobs. Each group needed to think of three aspects of the job and how they could represent the work on connected puzzle pieces. Next, we used the laser cutter we have to engrave the students designs on wood pieces and we displayed them on the windows in the library with written explanations with facts about the Ojibwe Peoples from each group. Each group created a write up about their logo design and included research and information about the Ojibwe Peoples to explain their designs. All of the student work was displayed in the hallway outside the library for the community to explore.
In the winter, the focus shifted to the growth of the City of Chicago and the influx of immigrants to the city. In the library we focused on Jane Addams and Hull House. Hull House was a settlement house founded by Jane Addams on the westside of the city to provide essential services to the immigrant population of the the growing neighborhood. This project included research, exploration of primary source documents, and books and online databases. First we read the book The House that Jane Built by Tanya Lee Stone. The book shares details about Jane’s life, the inspiration for the founding of Hull House, the services and her work to expand social services. We then talked about why Hull House would be important to the community. Students shared ideas and thoughts about supporting immigrant populations and supporting people in a community. We made deeper connections to our driving year long question “what does it mean to be a community?” After they read the book, students were given folders with pictures and drawings from Hull House that were shared from the Hull House museum archives and other sources. Students studied the pictures and drawings focusing on what the images showed them about programs and resources that Hull House provided, third graders collected notes in their field guides. Then students were given packets with facts and information about Hull House including Britannica online database articles and information collected from a variety of resources. Students took more notes about the services provided and why they were important for the neighborhood.


After the research and exploration part of the project, students were given a design challenge; Create a virtual Hull House museum in Minecraft. Students worked in group of threes to design and build replicas of Hull House focusing on highlighting what they learned about the organization and the services that Hull House provided to the community. First, groups brainstormed about the three areas they were going to focus on to build. Many students decided to design and build the library, nursery or kitchen. They also learned that Hull House had a theater where plays were put on and a music room where community members could learn how to play instruments and sing. Third graders also learned all about the playground that was the first public playground in Chicago and the gymnasium for exercise. They learned that very few of the houses had running water so Hull House provided a bath house for neighbors to come and shower to prevent the spread of illness. After the students decided on the rooms they were going to build, they worked with their partners to map out their Hull House ideas. Next, students moved into their Minecraft world. We set up servers so that student groups were all working in the same world to build. Students needed to talk to each other, negotiate and navigate their designs to make sure their rooms were connected and worked together. In their own rooms they focused on designing their rooms based on the research they did on Hull House, what would need to be each of the rooms to offer the programs that Hull House provided to the community. The final step was students recording audio tours of their Hull House museums to share with the community and educate the school about Hull House and the services it provided to the neighborhood.


This project was great for several reasons, it allowed students creativity in how they shared what they learned while still focusing on research skills and collecting information from print, digital and visual resources. The project focused on collaboration skills, students worked in small groups and designed and planned together to build their Hull House museums and write their scripts for their audio tours. For some students it was their first time building in Minecraft and for other students they are experts in Minecraft, this project allowed students to also be teachers, sharing their expertise in Minecraft with other students and being empowered to be teachers. Students were engaged and excited to learn more about Hull House and also to be able to create, design and share their ideas through Minecraft.

Next up Virtual Reality and Chicago Neighborhoods!

Wednesday, January 16, 2019

Learning About Peace with Kindergarten Students

In the kindergarten classes they have been having a lot of conversations about peace. What does peace mean? How can find moments of being peaceful? This is rooted in the helping young students learn about self awareness and self regulation of their emotions and finding peaceful moments of meditation. I wanted to do a project that connected some of the books we had on peace connected with a maker or building project that connected the ideas of peace with a project students could take with them and use to continue to make connections with the idea of finding moments of peace. That sparked the idea of Peace Lamps. We would read different books that talked about peace and being at peace and then kindergarteners would make their own peace lamps that they could use when they wanted to find some peace.

The project started with reading the book “What Does Peace Feel Like?” by Vladimir Radunsky. The story collections ideas about peace from children around the world. The book ask children what does peace feel like, smell like, taste like, look like and sound like to them. We read the book together and then kindergarteners reflected on what peace feels, smells, looks, and sounds like to them. They talked about the taste of their favorite foods they eat with their families on special occasions or the smell of fresh flowers in the summer and the feel of a hug from someone they love. For the next step, kindergarteners drew pictures of their different kinds of peace.

During the next class kindergarteners made their peace lamps. The students cut out their pictures of peace. Then they glued the pictures between two pieces of wax paper. Then we helped students roll their papers into a cylinder and glue it to the bottom of circle gift box. The final step was adding a small battery tea light inside the lamp. Now students have peace lamps to turn on when they need moments of peace and calm in their lives. This project made connections to the meditation practices and helping students learn to calm themselves and find moments of peace.


Thursday, November 15, 2018

Characters and Laser Cutting with 4th grade

My school library was able to purchase a Glowforge laser cutter! I am so excited to use this with my students. I have been following other makerspaces and libraries doing such amazing projects with a laser cutter and I am excited to try it out! The first project opportunity came not too long after we had the laser cutter up and running. A design project with fourth graders that connected to books they were reading with animals as the main character.

I have a fourth grade teacher who has her students do a lot of reading around genres and then really likes them to do a hands on project that connects to the work at the end. In the past the students have read books with animals as main characters and then had the students make the characters out of clay, here was a perfect chance to use the laser cutter and make some connections with technology and design work.

Students picked their books and then documented different aspects of the story including setting, characters, problem and solution. They also wrote up a profile of the main character of their story. Students documented the different characteristics of the main character and wrote a detail of the characters appearance.

Then, we moved into the design stage. Student were introduced to the laser cutter and how it works. Then we talked about how the they were going to create a laser cut project of the main character. The first step was looking at beginning drawing books, how to draw websites and images. Students would focus on how they could create their animal using different shapes similar to how to draw instructions. Fourth graders drew their plans thinking about shapes and following the ideas from the different resources.

Next, we introduced Google Drawing to the students. We showed them the shapes and lines tools. Students then took the base of their drawings and made shapes to create their animal in Google Drawing. They really had to spend time thinking about scale and size as they laid out their designs, thinking about the size of the different shapes and how they could layer the shapes together to give their character a three dimensional look. After students finished their designs, they separated the shapes on the drawing grid and downloaded the files as .svg. The files were uploaded to the Glowforge Laser cutter and cut out of the wood.

After all the pieces were cut, fourth graders used different materials like felt and googly eyes to add more details to their animals. They completed reviews of the books and displayed their writing with their laser cut animals in the library to share with the school.

This project went really well. The students were really excited about using the new laser cutter in the library. This was also a good opportunity to share Google Drawing and some of the different features of the application. It was also great to have the students think in two dimension and how to take shapes and put them together to make a 3D object. It was a different type of thinking for many of the students and an opportunity for them to mix technology, design and art to make their characters.


Tuesday, November 6, 2018

Press Here: Simple Circuits with Kindergarten

I've fallen a little behind in my blogging at the start of this school year but I'm committed to sharing more and adding to the blog! Here is my first post for the 2018-2019 school year!

I love the book Press Here by Herve Tullet. It is a wonderful interactive book to read to preschool and kindergarten students. As they read the book, press the different “buttons” and have the next page change it is almost like magic. Over the years the book has become very popular and many of my students have read the book multiple times and have it in their collections at home. This year, I wanted to come up with a plan that added a project or maker connection to the book and the Little Bits simple circuits and button pieces were a perfect fit!


I started by reading the book with my students. I love sharing this book and although many of the students have read the book before they were excited to hear and share the book again. For the first step, students created their own books inspired Press Here books. Using paper folded, students thought about different pages from Press Here and then drew dots on the first page and the action event on the next page. Kindergarteners had so much fun planning, drawing and then sharing their books with their classmates and teachers. They were also excited to take the books home and share them with their families.

The next step was introducing students to the Little Bits circuits (https://littlebits.com/) Little Bits are a great maker tool to use with young students. The circuits are magnetic and color coded so students know how to connect them correctly and in what order. They snap together when lined up correctly. Kindergarteners made connections with the imaginary world of the Press Here book and creating their own press here buttons that did make things move, light up or make sounds. Students worked in small groups to connect the pieces, decide on what they wanted their buttons to do and then adding the red, yellow and blue paper buttons on tops of the different Little Bits circuits. They had a great time testing out different pieces, Little Bits and configurations.

This project turned out great. The kindergarteners loved reading the book and making their own books inspired by the story. Press Here was also a great book to make connections with the Little Bits circuits, collaborative work and experimenting with circuits. It was an informative project, fun, hands on learning for the students and it did not require a lot of setup for the library! This was a good introduction as we advance with our projects and start to introduce more robots, coding and maker projects during the school year.

Wednesday, June 6, 2018

Stories, Inquiry & Design All Sewn Together

Last summer my school library was renovated and a beautiful design/makerspace was added. I was so excited to have a dedicated space for building and creating. I was really excited for the four sewing machines that we added! I learning to sew when I was younger but I had not kept up with it. I took a summer sewing machine class at a local arts center and I was all set to introduce sewing to the maker projects, I just needed to find the right project! Then I can across the picture book about Harriet Powers, Sewing Stories: Harriet Powers’ Journey from Slave to Artist by Barbara Herkert. This was the perfect book to fit into a maker project because there were so many connections with literacy, history and inquiry, collaboration, technology and maker. I worked with my second graders on this project.


The book tells the story of Harriet Powers. She was born into enslavement on a plantation in Georgia. She grew up learning how to sew from her mother and other women. When Harriet, her husband, and children were freed from slavery after the Civil War they worked on their farm and Harriet continued to make quilts for her family. The family farm fell on hard times and Harriet made the difficult decision to sell one of her quilts to buy food for her family. Harriet continued to make and sell quilts to support her family. Harriet’s quilt art is considered the best examples of this art form from the American South. Two of her quilts have survived. One is on display at the Boston Museum of Fine Arts and the other is at the Smithsonian in Washington DC.


After reading her story we discussed Harriet’s life. There was a lot to talk about and think about with this story. We spent time discussing enslavement and the impact of that system on families and individuals. There were a to discuss and work through and I feel my students were very thoughtful and the subject was tackled in a second grade appropriate way.  

Then students examined her work. Using the See/Think/Wonder thinking routine students took a deeper look at Harriet’s quilt work. This routine encourages students to make careful observations and thoughtful interpretations. It helps stimulate curiosity and sets the stage for inquiry.  Students explored Harriet’s quilts and what stories she was trying to telling in each square. We then talked about what the inspiration was for the quilt squares.


The next step was for students to design their own quilt inspired by the work and style of Harriet Powers. Students brainstormed important events from their second grade year. They thought about a special project, presentation, time with friends or moments from the year. Once students picked one event to focus on they started to sketch their quilt square out thinking about Harriet’s style and the idea of telling a story with pictures.
Then students created their quilt pieces in Google Drawing. Students used the different shapes that were available in the program to design and create their pieces. It was very interesting to see how they took different shapes and manipulated them to create their stories. Some students used the lightning shape for hair or the number eight to make a violin. The Google Drawing files were then saved and downloaded as svg files. The library purchased a Cricut cutter for the makerspace. This machine cuts fabric, foam and paper. It was great to use for this project because students were able to design in Google Drawing making it more accessible and possible for them to make the images and pieces that they wanted to.


Students were given three options to choose from for their quilt materials, fabric, fabric paint and sun fabric. The fabric and traditional sewing option was the most popular. For students that picked fabric paint their pieces were cut out in foam and then the mounted the foam to cardboard and used fabric paint to stamp their quilt squares. Sun fabric works by placing paper pieces or designs on the fabric and then putting it out in the sun for 15 to 20 minutes. The fabric that is not covered becomes a dark blue and the parts that are covered stay white. Then the students sewed their sun fabric to the larger quilt square. Then I sewed the whole quilt together to make a collaborative second grade memory quilt that is now hanging in the library hallway.


All the students were able to spend time using the sewing machines and hand sewing. It was amazing to watch how some students took to sewing right away and really got into the craft. All the second graders were really into this project and were so excited to get to work with sewing, fabric and the sewing machines. They were so thoughtful about their questions and observations learning about Harriet’s life and examining her work. This is one of my favorite projects that we did this year!

Monday, May 21, 2018

Students combine Technology, Literature and Art to Make Beautiful Music

During this past school year senior kindergarteners have been learning about coding and programming using the MakeyMakey, Scratch and coding robots. As the school year is coming to a close I wanted to do a combined hands on project that connected with coding, maker, art and literature.

We started with reading the book Drum Dream Girl by Margarita Engle and illustrated by Rafael Lopez. The book is inspired by the childhood of Millo Castro Zaldarriage, a Chinese-African-Cuban girl who broke Cuba’s traditional taboo against female drummers. The book is beautiful, the illustrations are gorgeous and the text is wonderful and the story is a great. Kindergarteners made connections with the rhythms and sounds in the poetry of the text and the vibrant colorful art of the images. We also had a great conversations about equity between boys and girls.


Next, we recorded audio of sounds of different drums. Students explored different types of drum sounds and picked the ones that they liked the best. Then we created the Scratch coding. Scratch is a drag and drop coding program that kindergarten students have been using this year.


The next step was to make connections with the MakeyMakey. We connected alligator clips to the buttons we coded on the Scratch code. Then I hammered nails into Crayola markers. The alligator clips were connected to the nails. The MakeyMakey needs a home or earth connection that triggers the Scratch coding to work. We connected the earth key to a piece of paper and then sprayed the paper with water to make it conductive making musical markers! When students started drawing on the paper the drums sounds started playing! Kindergarten students had so much fun with this STEAM project!